I quickly found 3 flags, some cute ribbon and twine. When I got home it was just a few snips and a little hot glue and I was able to create 3 door decorations for just $5!
From this little crafting adventure I was inspired to see what else I could create with treasures from the Dollar Tree. I found this amazing blog post HERE that gave me tons of ideas. I headed back to the store and got lots of goodies.
I started off simple. I wanted to add some succulents to our bedroom. I found these online for $15.
At the Dollar Tree I was able to purchase a few supplies for $5 and got the result I wanted!
For the next project I wanted to create a little planter. I had seen these items in the store and thought they were a bit pricey.
So when I found these similar planters at the Dollar Tree I was stoked!
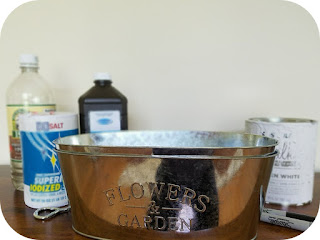
I followed Katie's directions HERE to age the planters just a little bit. I wasn't sure if it would really work or not but I was surprised it did! I will say it was not difficult to do, but I did become impatient during the process and well one side definitely looks better than the other! :) I just added a little rope for an extra touch and then placed my plants inside! So easy for just $2!
If you have been to my house, you know that I have a slight obsession with lanterns. I am hoping it is not a decor trend that will be leaving soon considering how many I have purchased! :| I saw on pinterest how people used frames from the Dollar Tree to create a lantern and knew I had to give it a try.
I purchased 4 8x10 frames and 4 5x7 frames. With this $8 purchase I was able to create 2 lanterns VERY EASILY! I would recommend that you choose frames that are flat faced and have very little "ornateness" to them, it will make it easier to glue them together. Literally all you need to do it take the backs off, put a little hot glue to make sure the glass stays and then glue the four frames together. I will admit that on my first attempt gluing I got a little confused and created more of a diamond than a rectangle, but it was very easy to fix...and I am sure you are brighter than I am and you won't have that problem! ;) I added an X with a silver sharpie and I added a little rope across the top as a handle for a little touch of detail.
Next I wanted a few pots to add greenery to. Once again Katie had a great idea. Found HERE! When I got to the Dollar Tree they didn't have the terracotta pots in the size I was hoping for, so I found another solution.
I spray painted the two plastic pots and then added just a few touches of white paint and some twine. This was soooo easy to do and I love how the pots turned out for just $2!
Last but not least, I wanted to add some candles to my master bathroom. I was looking for a glass and gold combination and couldn't find quite what I was looking for. For just $5, a little spray paint and hot glue I was able to get something perfect!
I hope I helped you get some inspiration today but more importantly I hope that I was able to help you keep a few more $$ in your pocket! :)


